The Hellohire Jobs Widget makes it easy to showcase your organization's published job openings directly on your website.
The widget automatically displays your available job postings and updates when you make changes in your Hellohire account.
This guide explains how to access, customize, and add the Jobs Widget to your website.
1. How Does the Widget Work?
The Hellohire Jobs Widget dynamically displays your published job postings.
For each job, it can display:
Job title
Job location
Salary information
Job highlights
Job description
Whenever you update your published jobs in Hellohire, the widget automatically reflects those changes without requiring you to manually update your website.
2. How Do I Prepare My Job for the Widget?
Before adding a job to your website, make sure its details are complete.
Log in to your Hellohire account.
Navigate to Jobs.
Select the job you want to publish.
Open Job details.
Review and complete the job information, including:
Job title
Job location
Salary information
Job highlights
Job description
Update the Job Status to Published.
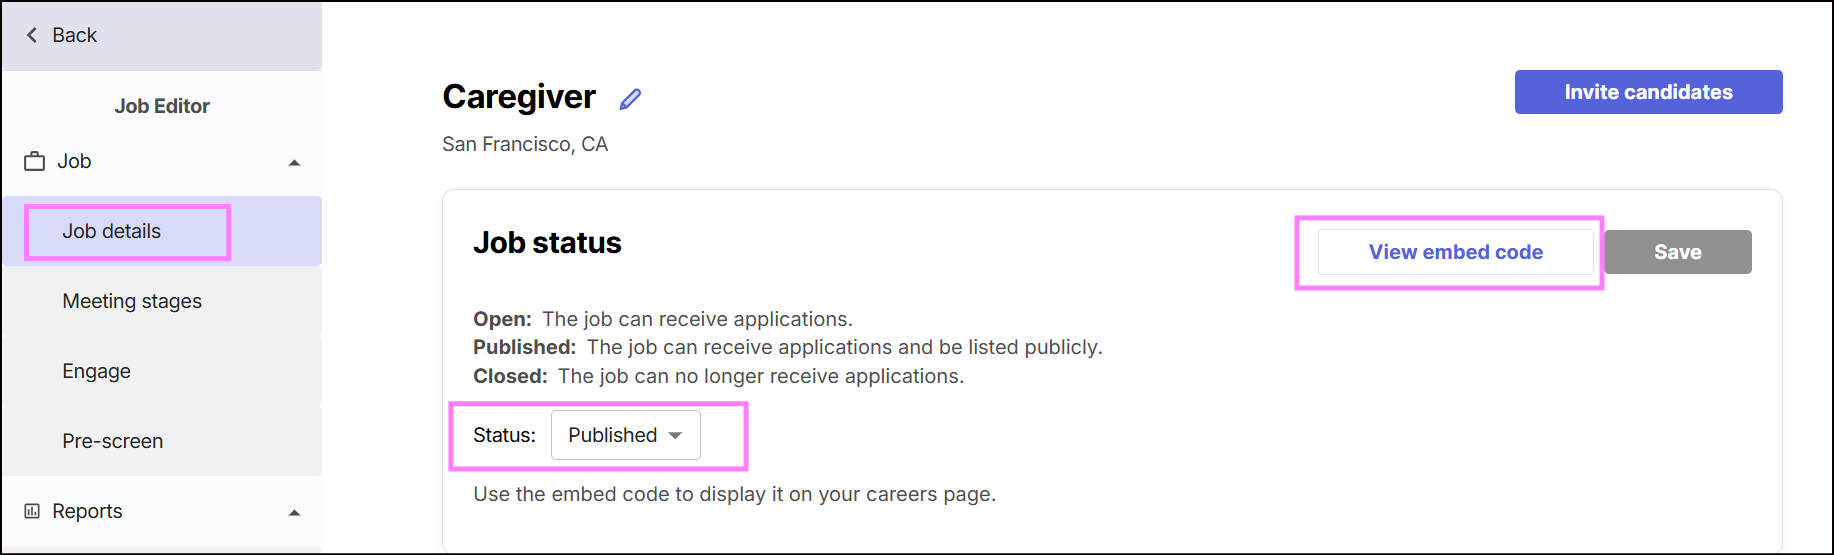
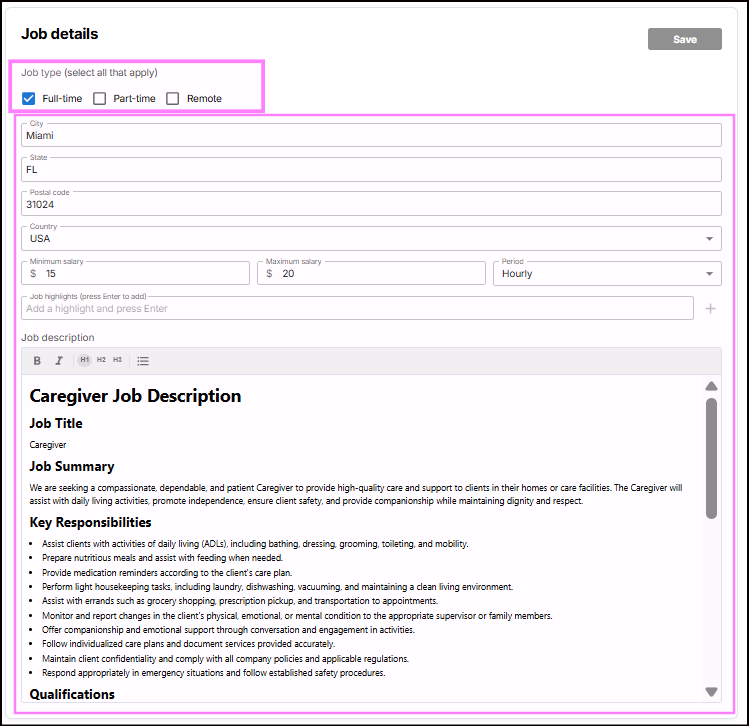
Important: The View embed code option is available only when the job is Published. Jobs with an Open or Closed status will not display this option.
3. Where Can I Find the Embed Code?
To access your Jobs Widget embed code:
Navigate to Jobs.
Select the job you want to manage.
Open Job details.
Locate the Job Status card.
Make sure the job is set to Published.
Click View embed code.
Copy the generated embed code.
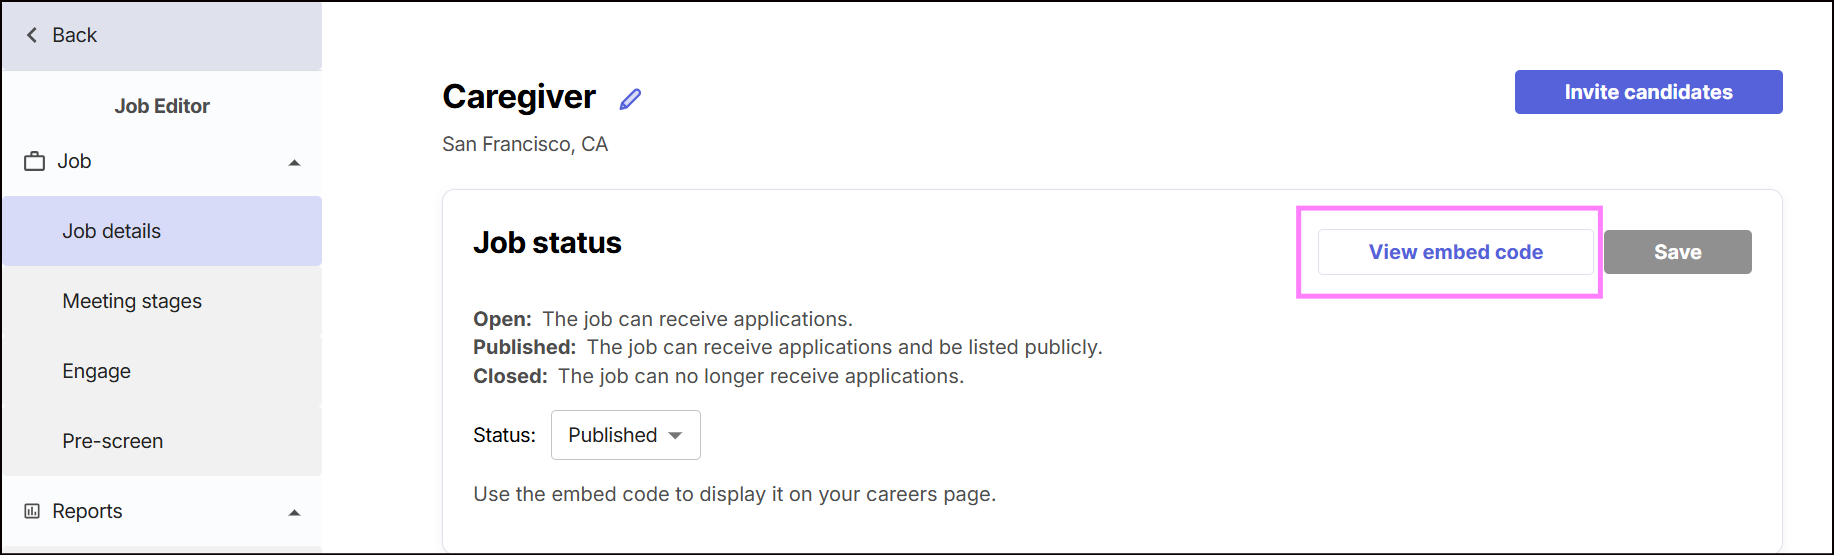
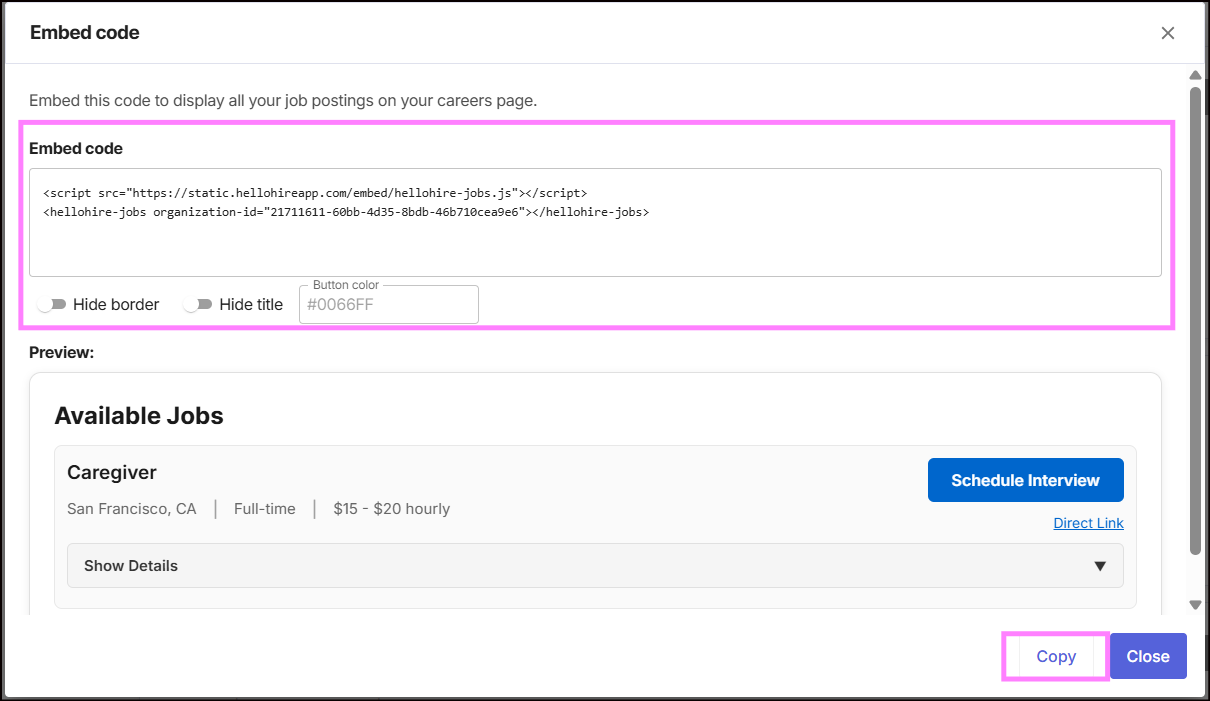
Important: Always copy the embed code directly from your Hellohire account. The code contains your organization's unique identifier (UUID). Do not manually enter or replace it with a numeric organization ID.
4. Can I Customize the Widget?
Absolutely! Hellohire allows you to customize the appearance of your Jobs Widget before copying the embed code.
From the View embed code modal, you can adjust the following settings:
Border: Customize whether the widget displays a border around its content.
Add the "borderless" attribute. Example:
Title: Customize whether the widget displays its title.
Add the "no-title" attribute. Example:
Button Color: Change the color of the buttons to better match your organization's branding.
Add button-color="<HEX code>" to match your brand colors. Example:
After selecting your preferred settings, copy the generated embed code. Your selected customizations will be reflected in the code.
5. How Do I Add the Widget to My Website?
Once you've copied your embed code:
Open the HTML editor or website management platform for your careers page.
Locate the section where you'd like the Jobs Widget to appear.
Paste the copied embed code into the appropriate HTML section.
Save or publish your website changes.
Visit your careers page to confirm that the widget is displaying correctly.
If you don't have access to your website's HTML, you can share the embed code with your website administrator, IT team, or web developer so they can install it for you.
Once installed, the widget will automatically reflect updates to your published jobs in Hellohire.
Hellohire Support
Have questions or need assistance? We’re here to help! Feel free to contact us at support@tryhellohire.com.
Was this article helpful?
That’s Great!
Thank you for your feedback
Sorry! We couldn't be helpful
Thank you for your feedback
Feedback sent
We appreciate your effort and will try to fix the article